KeePassXC + Syncthing
In this tutorial, we will be showing you how to sync your passwords without using the cloud! This can be done across mobile devices like Android and iOS as well as various OS’ like Linux, MacOS an Windows. This tutorial will focus on Linux, but the basic principal and process should be the same for all other OS’. For this to work well, it is recommended to start this on a PC that would be considered your main PC, or dedicated PC. All other devices, will sync to this “main” or master device.
KeePassXC – Visit site
Syncthing – Visit site
The Software:
Install the following software, On DeLinuxCo it should come preinstalled on the ISO Since May of 2026.
syncthing – running as a serviceKeePassXC – On DeLinuxCo install keepassxc-appimage
Note: on Linux, after installing syncthing, you must enable the service as a user. if the user name is Bob, you would enable using a command like sudo systemctl enable --now syncthing@bob.service this will enable and start the service. This will allow the service to run in the background even if the user is not logged in. On DeLinuxCo, you can verify that the service is already running using the following command: systemctl status syncthing@$USER to check the current user, or you can replace $USER with which ever user you want to check,
Configuration:
Next step is to create a specific folder to hold the PW database, In Linux it should be in the users root Directory, in our example, /home/bob/<yourfolder>, for this example, we will create a directory called KeepWD, but again, this can be named what ever you like. For Windows users it is recommended to use C:/USERS/<username>/KeepWD , you basically want it out of the way of One Drive possibly picking it up and pushing it to the internet, if this is even possible.
Start KeePassXC and select + Create Database
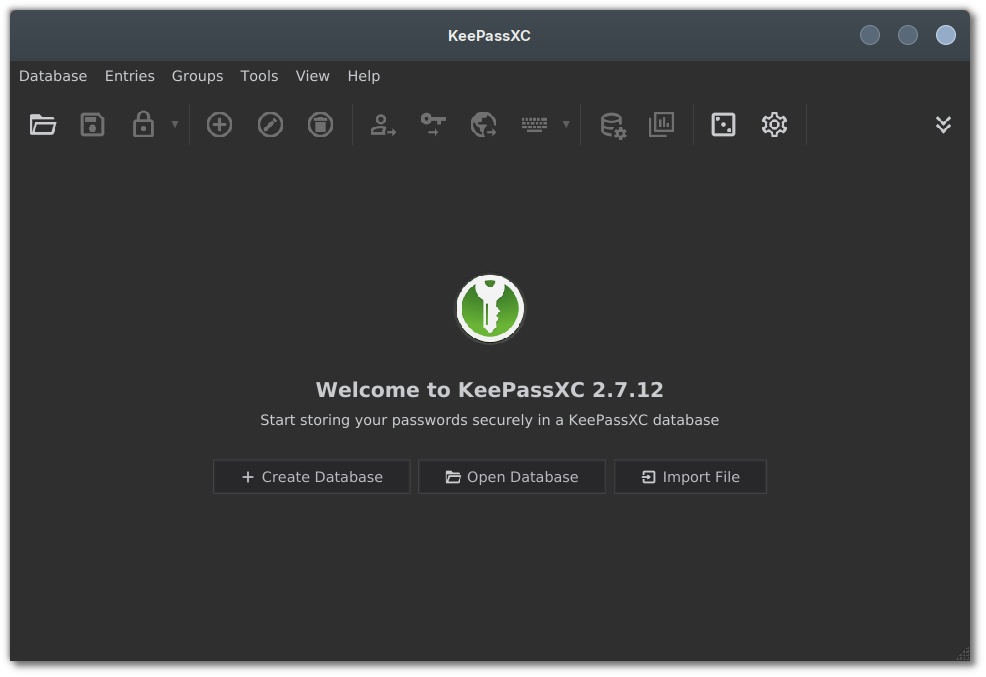
Then give the Database a name and then a password on the following screen. At the end it will ask
you where you want to save the database, make sure you select your folder, in our case, it would be KeepWD.
Afterwards, it should take you to the KeePassXC main window. Now we need to change some important settings. Use the next few screenshots as a reference.
Next, we need to enable browser integration so that you can auto insert the passwords into web sites etc. Click Browser Integration on the left pane and select “Enable browser inegration” on top, then select the browsers you want to have access to KeePassXC.
Next we need to add a browser extension that will connect to KeePassXC and auto insert user names and passwords as well as collect user names and passwords. These extensions are available for almost all browsers, just search for KeePassXC-Browser.
Then go to the plugin section and open the extension. Then click the Connect button. Give the connection a name. A good method is <machine-browser>, example: Dell6230-Firefox.
After you create the connection to KeePassXC from the extension, go to a website that requires a login and login normally, the browser should ask you if you want to create a new entry in KeePassXC, answer yes. Then open KeePassXC and you should see a new item on the left called KeePassXC-Browser-Passwords, this is where you want all passwords to be kept should you manually create entries. You select KeePassXC-Browser-Passwords on the left pane and then Click the Plus icon to add an entry.
Then when you go to a site , you will see a green KeePassXC icon in the user name field, click the icon and it will auto populate the entries. If there are multiple entries for that site, it will ask you which one to use. If you have multiple browsers, you can run through the extension procedure for each one and they will all access the same database in KeePassXC.
Now, you need to sync this with other computer and devices. IN DeLinuxCo, go to the Main menu and select Syncthing from the Favorites menu.
Under Folder Label, put the name of the KeePassXC directory you created to hold the database and under Folder Path, set it to the actual path on your computer, in this case, it is inside the home directory and ; ~/KeepWD
Now you should see KeepWD listed under the Folders section!
At this point, you are done with this computer. Go to your next computer/laptop and setup Syncthing to sync with this main/master device.
Basic steps:
- setup Syncthing on second device and add a remote connection to main/master device.
- Go to main/master device, select KeepWD > Edit and under Sharing, select your newest device.
- Then go back to second device and install and configure KeePassXc just like on the main/master device. Except, do not create a new database, but “select and existing database”, which will be the one that just synced.
- Add the Browser extensions
You now have complete control of your passwords, synced between all your devices without a third party cloud provider. It is recommended to delete all of your passwords from your browsers and turn off prompting to save passwords in your browsers.
To sync with your iOS devices, use the following apps:
Mobius Sync – For synncthing integration
KeePassium – Password Manager Integration
For Android Devices:
Syncthing-Fork – For Syncthing integration
KeePassDX – Password Manager Integration
These are by no means the only apps to use, but these have been tested to work. 🙂
Oh, and one more thing, in case you have not caught on, syncthing is how you can sync your documents between all of your devices. Then on your main device, setup your backups, in DeLinuCo, use duplicati, so that when you are away/traveling with your laptop, or what ever device, will sync to your main/master device and your main/master device will back up everything locally, and if you prefer even to your cloud of choice. You are now your own cloud provider.
Idiosyncrasies
- iOS background syncing is not available, you have to occasionally open the Mobius app, for synchronization to happen.
- Once KeePassXC is all setup, it will ask you for the Master Password every time, this is the way it is suppose to work. The password should also NOT be the same as your login to your system.
- When KeePassXC loads at every login, it should automatically ask you for your password. If you get the window asking you to select a database first, do the following. Select the database and login to open the app. Then right click on the icon in the system tray and “Quit” KeePassXC. Open KeePassXC again, and it should just take you right to the password dialog from now on.